
Braid Hairstyles
How to do Dutch Braid for Beginners – 5 Steps

Oct
A Dutch braid is a straightforward process, but that doesn’t imply it’s uncomplicated or uninteresting. Dutch braids are another easy way to look adorable, and Instagram and Pinterest show us how to rock and slay them. Continue reading to see how to do it yourself and join the band of slaying Dutch braiders!
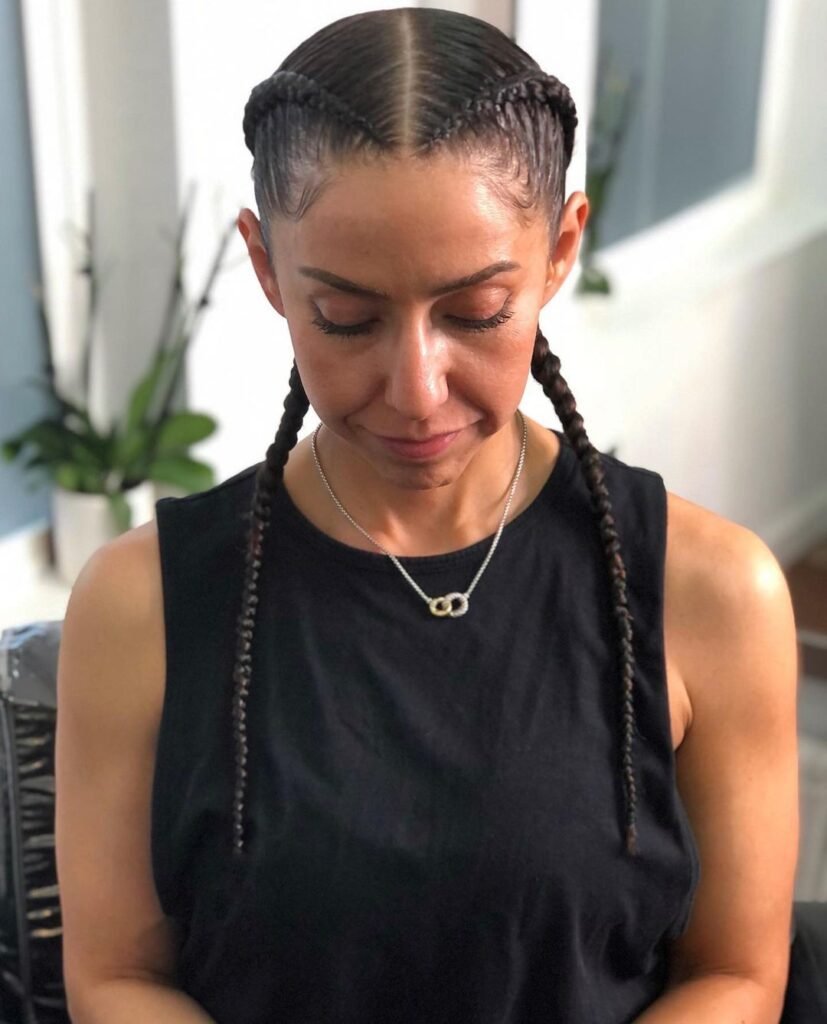
The Dutch braid is the opposite of the French braid and is also known as the “inside-out” braid or the reverse braid. The only difference is that the pieces of your braid are brought under rather than over and into the middle like you would for a French braid.
Is Dutch braid the same as cornrows? Cornrows involve a combination of multiple Dutch braids lying side by side. Dutch braids have African ancestry, where the women were trying to protect the hair from the sun, weather conditions, and excessive physical manipulation, they eventually found that they look good in it if done properly and it serves to protect the hair well too.
The Dutch braid method is one way to attain beautiful waves for straight-haired women, in a straightforward and almost instant process. One which the damp hair is braided, and left in overnight, voila! Curls at its wake!
Dutch Braid: Preparatory Process

A moisturizing shampoo is a good place to start because it frequently has fewer and softer surfactants than ordinary shampoo, which is beneficial for the health of your hair.
After that, you apply a conditioner! Never skip this step because the conditioner balances the negative charges left behind after shampooing, keeping hair hydrated, preventing split ends, and reducing frizz. By sectioning off your hair and working your way up and outward, you may gently detangle the knots using a wide-tooth comb or your fingers.
Rinse the conditioned hair thoroughly before applying your leave-in conditioner and other hair care products using the LOC or LCO method, which denotes how to apply leave-in conditioners, creams, or oils, respectively. Then you may either straighten your hair or let it air dry.
Stretching your hair would improve the appearance of the braid for the curly-haired folk, but it is not necessary! you can make do with what you have and pull off a gently tousled and messy Dutch braid appearance if that’s the look you are aiming for.
How to a Dutch Braid: Step by Step
Step 1
To begin, go through your hair with a comb to remove any tangles and any previous partings. Take a portion from your front hairline by running your thumbs through your hair. Your forehead should be the breadth of this area. Using this technique, you’ll make a broad braid that runs down the middle of your head.
Step 2
Grab the section and split it into three equal hair pieces with the pinkie holding the left strand and the middle finger, the centerpiece all held at the left hand, and the right strand at the right hand. The finger positioning is paramount to the outcome and orderliness of the braids.
Step 3
After crossing the left hair part under the center one, you should do the same with the right section. It’s time to begin to add in more hair. Combine the existing left section with a short section of hair that is already down on the left side.
Step 4
Cross them both under the middle as usual. Next, repeat the process on the right side by combining the right part with some hair. The entire technique is to cross that combined segment under the middle section. Although it might appear difficult at first, if you comprehend and grasp the fundamentals, you will be braiding a Dutch braid like a pro in no time.
Step 5
Keep braiding! Repeat crossing under the center add extra hair to the right and add extra hair on the left and cross it under the middle until all the hair is braided up until the nape of your neck.
Check in the mirror when you reach the nape of your neck to mark your progress and see what it looks like, then part all of your hair to the side and braid it into a standard three-strand braid to complete the style.
Conclusion
The braids would turn out perfectly with patience and lots of practice. It also helps if a family member or friend braids someone else’s hair in front of you so that you may see and ask questions.
Importantly, keep experimenting with your hair and let go of the notion that it will turn out properly while watching movies and TV shows play around with it! It helps and before you know it your hands have figured it out already!
For more volume and grip, a spray after the finished look and the use of volumizing powders would be of great help, and bobby pins and accessories can help for a more put-together and beautiful finish.
