
Faux Locs
How to Achieve Stunning Butterfly Locs at Home

Mar
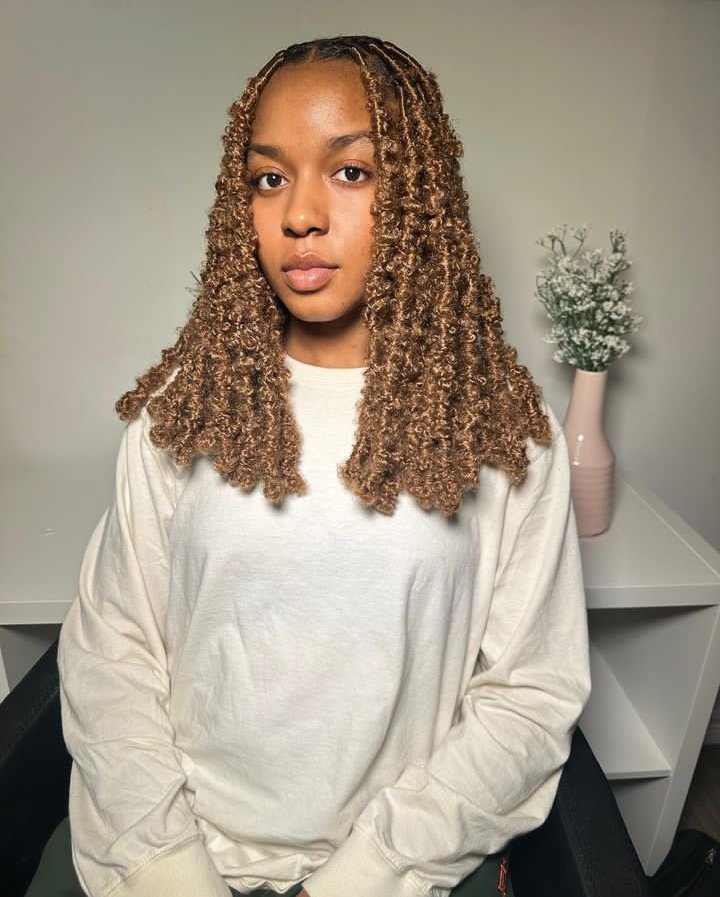
Butterfly locs are a trendy type of faux locs that offer a stunning and effortless hairstyle option. These locs imitate the appearance of traditional dreadlocks but with a unique twist – they feature curly loops that resemble a butterfly’s wings. This style has become increasingly popular in recent years due to its distinct look and low-maintenance nature.
Butterfly locs are particularly popular among people with natural hair or for those who simply want to switch up their looks. In this article, we will discuss how to do butterfly locs step-by-step from the comfort of your home.
Butterfly faux locs are a type of protective hairstyle that involves installing faux locs with small sections of curly or wavy hair at the base of each loc to create a butterfly or fairy-like effect.
The name “butterfly locs” comes from the unique shape and texture of the locs and not to mention the eccentric yet stunning appeal of butterfly locs, which can also be styled in a variety of ways, with the bonus of protecting the hair from external elements and excessive physical manipulation. Butterfly locs can last for several weeks or even months with proper care and maintenance.
The process of creating butterfly faux locs can take several hours, depending on the length and thickness of the hair, as well as the desired size of the locs.
DIY Guide: Achieving Beautiful Butterfly Locs at Home
Creating butterfly locs is a multi-step process that can take several hours depending on the length and thickness of your hair. Here is a general guide on how to create butterfly locs:
Step 1: Gather Your Materials
Before you begin, you’ll need to gather your materials. You’ll need:
- Crochet hook
- Faux locs hair extensions
- Leave-in conditioner or hair oil
- Shine n jam
- Free tress passion twists
- Rat tailed comb
Step 2: Prepare Your Natural Hair
Butterfly locs can be installed on natural hair or on hair that has been previously relaxed or chemically treated. However, if you plan to install butterfly locs on natural hair, it’s important to properly detangle and moisturize your hair before beginning. Apply a leave-in conditioner or hair oil to your hair to help keep it moisturized during the installation process.
Step 3: Techniques for Installation
To begin butterfly locs, start with clean, dry hair that has been detangled, and parted into small sections. There are two known techniques for butterfly loc, the thumb method, and the pull method.
Thumb Method
To create the butterfly locs hairstyle, start by preparing your hair. Apply a braiding gel or shine n jam to a small section of hair and divide it into three equal pieces. Braid the hair by placing one section over the other, starting at the root and working your way down.
For those with natural hair who experience difficulties unraveling the braids, twisting may be a better option. To twist, split the hair section into three bits, then braid the hair at the root before splitting a piece and adding it to the other two pieces. Layer the halves over each other, making sure it’s tight at the roots.
Next, grab a faux loc and open the loop. Insert the crochet hook at the root of the braid and pull the loop through the crochet needle. Take the end of the faux loc and crochet it through the top of the loop, pulling it through to secure the loc.

Take two strands of passion twist and run your hands through them to gently untangle and smooth them. Crochet the passion twists through the braid roots, making sure one piece is longer than the other. The longer piece will be used as the wrapping hair.
Wrap the passion twists tightly around the braid three to four times, and then stick your thumb in the middle of the wrapping hair. Continue wrapping the hair under your thumb a few more times, then remove your thumb to create a loop. Continue wrapping the hair downwards to create as many loops as desired until you reach the end. Tie a knot and wrap the remaining hair upwards before palm-rolling it to create a smooth finish. That’s it!

The pull method
The pull method is less time-consuming than the twist method, but it requires a higher level of expertise. To use the pull method, you must wrap the hair tightly and loosely in an alternating pattern, then tug on the locs to create a loop.
If you’re not experienced with this technique, it’s easy to make mistakes, so beginners should use the thumb method instead. Alternatively, you can use pre-made butterfly locs and crochet them in, eliminating the need for the above methods.
Step 4: Continue the Installation Process
Repeat the process of installing butterfly locd to your hair until you’ve covered your entire head. The size and number of sections you create will depend on the desired size of your butterfly locs.
Step 5: Finish the Installation
Proper installation of butterfly locs is crucial to prevent hair damage, and it’s important to knot the ends securely to avoid unraveling, as these locs cannot be sealed by dipping them in hot water.
Step 6: Maintenance
Butterfly locs are relatively low-maintenance, but you will still need to take care of them properly to ensure they last as long as possible. Use a gentle shampoo to cleanse your scalp and locs and avoid using heavy oils or styling products that can weigh down your hair. You should also avoid excessive manipulation of your locs, as this can cause them to unravel or become frizzy.
Conclusion
Butterfly locs are a versatile and beautiful hairstyle that can be achieved at home with the right tools and techniques. While it may take a few attempts to perfect the look, the end result is definitely worth the effort.
With a bit of patience and practice, you can create stunning butterfly locs that will last for weeks or even months with proper hair care. So take your time, put in the effort, and enjoy your fabulous new hairstyle!
