
Braid Hairstyles
Master the Art of Goddess Braiding with These Easy Steps

Feb
Ever looked at a picture of a Goddess braids and thought: “I want to do that”. If so then you’re in luck! Goddess braids are a popular hairstyle that even women with long hair can pull off. If you want to try out this style but you aren’t familiar with the technique, this article would work you through its step-by-step process.
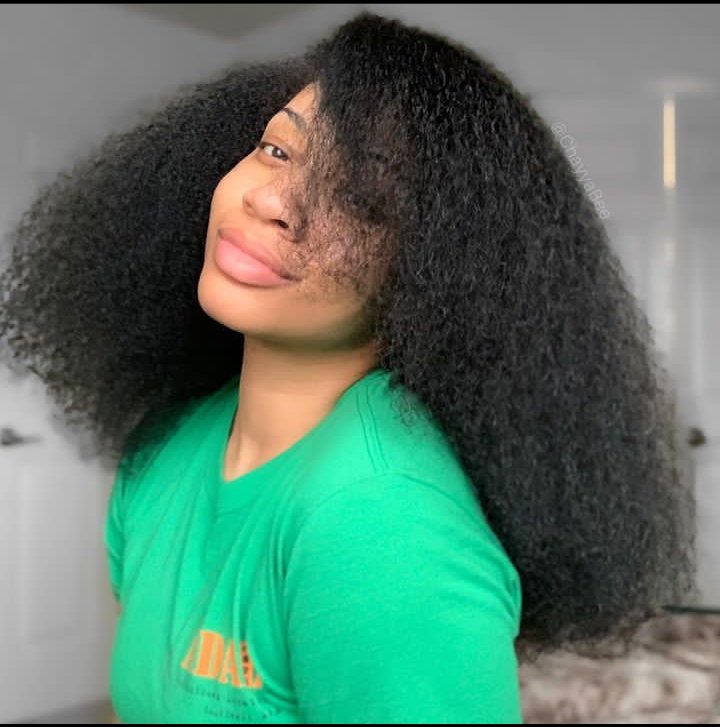
Goddess braids are characterized by curls and medium to large-sized box braids. It requires the use of braiding hair extensions such as kenakelon braiding hair and curly hair pieces, free stress hair is popularly used. Goddess braids are an aesthetically pleasing appearance and can make you feel and look like a Goddess.
Goddess braids are most often confused with bohemian box braids. However, as similar as they look there is a characteristic difference, with boho box braids, there is an eccentricity that comes from the curly pieces arrangement which can be left at the middle, front, and end of the braids scantily while with Goddess braids styles it comes off as free-flowing and curly ends.
Several benefits of Goddess box braids are unrivaled including protective stylings, like all braids it protects the hair from external elements that could be damaging to the hair such as weather, humid environment, and excessive physical manipulation. Goddess box braids can last for up to 8 weeks with adequate maintenance.
Goddess box braids do not require much effort in terms of maintenance and can do great with frequent moisturizing, sleeping with a protective head wrap, and keeping frizz at bay with sprays and mousses.
Goddess Box Braids: Preparatory Process
The start of any braided hair styling is to prep the natural hair ready for installation. Your hair would be tucked in the braids, so it’s paramount you give it the nourishment it needs while getting rid of dirt, product buildup, and oils. The following steps are how to get your hair ready and in the best state necessary:
Step 1. Shampoo
The first and foremost step is to wash your hair. Do this with a moisturizing shampoo, one that contains milder surfactants. Surfactants are highly placed cleansing agents, the drawback however is they do their job so well and rid the hair of its natural oils required to keep it healthy, encouraging dryness.
During the shampooing process ensure your focus is on the scalp and rub gently but thoroughly. You could use the scalp brush as an aid for the washing process. You must do a thorough cleaning as that might not be completely possible in a few weeks.
Step 2. Condition
The shampooing process typically leaves behind negative charges and what a condition does is counteract those charges while ensuring your hair gets the moisture it needs, and prevents split ends. It is advised to go in for deep conditioning as it provides 3 times the hydration of a regular conditioner.
During the conditioning process, grab a wide tooth comb and detangle your hair in sections working your way upwards from the ends of your hair.
Step 3. Moisturize
Applying for a leave-in conditioner is the final step in the wash day process and is incredibly important as it provides lasting hydration. Lightweight leave-in and oils should be applied to damp hair, in sections to ensure all the strands are adequately coated.
Step 4. Stretch Your Hair (Optional)
For naturally textured hair, it can be a bit challenging to work with if they are not stretched however, it isn’t a necessity. But, if it is done the braiding process would be way easier.
The easiest way to stretch your hair is to brush through with a blow dryer to ensure your hair’s safety. Apply a heat protectant to sections of your hair before the process. For a heat-free method, the African banding method would work just fine.
Separate your hair into four sections, grab a section and an elastic band, and start wrapping at the roots and progressively downwards till the ends of the hair. Allow to air dry. Remove the bands once the hair is dry.
How to DIY Goddess Box Braids: A Step-by-Step Guide

Goddess box braids can be done in the comfort of your home, but it requires patience as it can particularly be time-consuming and a bit challenging to install without assistance.
Step 1: Gathering Supplies
Start by gathering supplies needed for the braided hairstyle. Here is a list of what is needed:
- Shine n jam
- Edge control
- Rat-tailed comb
- Butterfly clips
- Wooden rack
- Pre-stretched Braiding Hair
- Free stress detwist hair
- Superglue
- Scissors for hair
Step 2: Sectioning
Working your way from the back section create a horizontal row and split it into boxy-shaped sections with a clip to separate each section. Afterward, arrange your pre-stretched hair into the wooden thread rack to facilitate speed and precision.
Step 3: The braiding process
Apply shine n jam to the parts for a firm grip and clean part. Additionally, shine n jam is loved for its moisturizing and conditioning properties. Take a piece of the pre-stretched braiding hair and split it into two, and place it on the other in a crisscross motion.
Take a section, split it into three parts, place the braiding hair extensions over the parts and braid in a typical three-strand braid manner. Continue braiding, well over the natural hair length.
Step 4: Addition of the Curly Pieces
After braiding to a considerable length, take a piece of free stress detwist hair and add it to the left and middle strands of the braids and continue braiding as normal. In the addition of the curly piece, there isn’t a definite point as to when to add the curly hair pieces. It depends on the overall look you are aiming for.
It is important to note that you shouldn’t braid your hair too tight as it can lead to breakage and hair loss, thinning edges, and even traction alopecia. Do not fall under the impression that your braids need to be too tight for them to last. You don’t need to braid the hair extremely tight for the style to last.
In addition to the curly pieces, ensure it is done spontaneously and not in a uniform manner to give off the free-flowing nature accustomed to Goddess braids.
Step 5: Secure the braids
Take a tiny piece of hair and wrap it around the braids, and at that point where the knot is to be formed take a superglue and make a little dip at that point afterward make a knot. This process is necessary to secure the braids, as it isn’t going to be dipped in hot water to prevent relaxing the curls.
Step 6: Finishing Touches
Take a pair of scissors and cut off the remaining bit of braiding hair left after making a knot for a polished look. After that, trim off the flyaways at the top of the braids, pay extra attention during the process and take your time since you’ll not be dipping the braids in hot water, it is an essential step.
Dip a towel into hot water and rub lightly at the top of your braids after the trimming process. Grab a edge control and lay your baby hairs for a sleek look and you are good to go!
