
Braid Hairstyles
How to Curl the Ends of Your Box Braids – 8 Steps

Feb
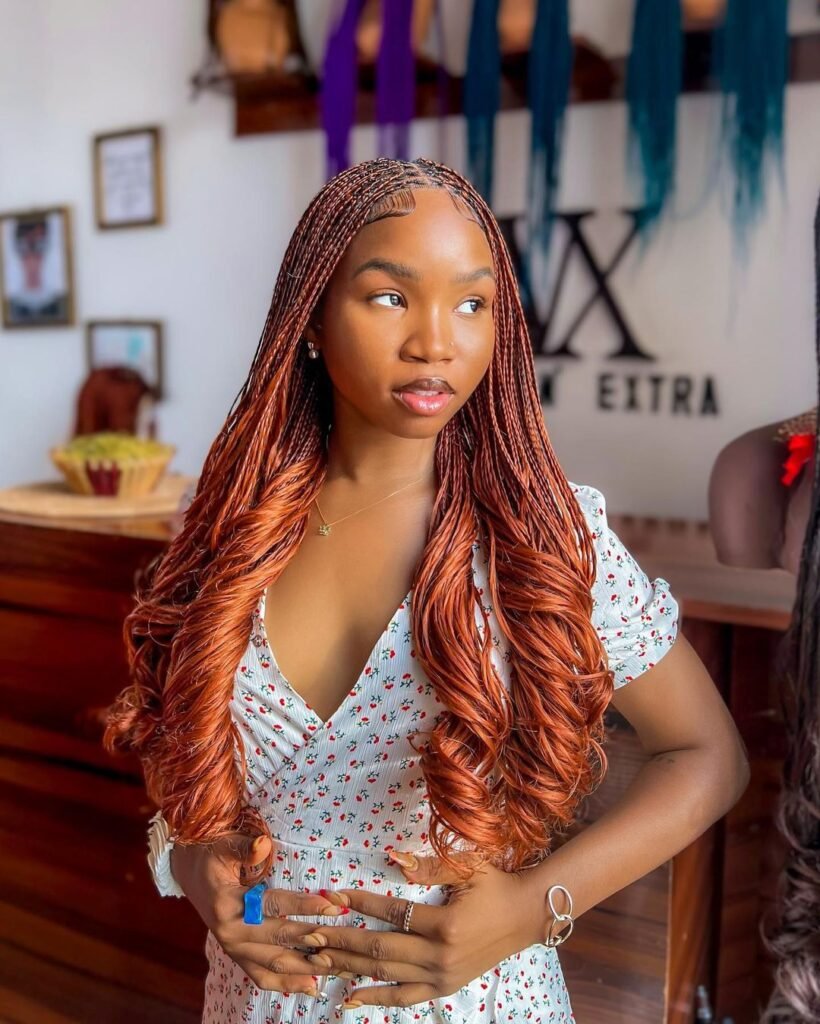
Box braids are a popular protective hairstyle that has been worn by many for years. They’re low-maintenance, and when properly installed and maintained, they can last for several weeks. Box braids are versatile and can be styled in various ways, including curls.
To curl the ends of box braids, you’ll need a suitable curling tool that can create the desired curl pattern without damaging the braids. Here are some suitable curling tools you can use:
- Flexi rods: Flexi rods are flexible, foam rods that can create different types of curls, from tight to loose. They are gentle on the hair and won’t cause damage to your braids.
- Curling wand: A curling wand is a heated styling tool that can create tight or loose curls. They come in different sizes, so you can choose one that will create the curl size you want.
- Curling iron: A curling iron is a heated styling tool with a clamp that can create different types of curls. They also come in different sizes, so you can choose one that will create the curl size you want.
- Hot rollers: Hot rollers are heated rollers that can create a uniform curl pattern. They are easy to use and won’t cause damage to your braids.
How to Curl the Ends of Your Box Braids For The Best Results Without Direct Heat
It’s best to curl your box braids without using direct heat, but there are other ways to do it as well. Here’s a great method to do it without using direct heat, as well as other techniques:
Step 1: Prepare Your Braids
Before you begin curling your box braids, you need to prepare them by separating them into small sections and securing each section with a hair tie. This will make it easier to work on each section of hair.
Step 2: Set Up Your Curling Station
To set up your curling station, you will need to fill a bowl with hot water. The water should be hot enough to curl your braids but not so hot that it burns your scalp. You can test the temperature of the water by dipping your finger into the water. It should be hot but not too hot to touch.
Next, you’ll need to prepare your curling rods or perm rods, rollers, strings, or whatever you’ll be needing for this process. Take a curling rod and wrap the end of your braids around it. Make sure to wrap the braid tightly around the rod, so it stays in place. Once the braid is wrapped around the rod, secure it with a bobby pin.
Step 3: Dip Your Braids in Hot Water
Once your curling station is set up, it’s time to start curling your braids. Take one of your prepared sections of hair and dip the ends of your braids into the hot water. Make sure the ends of the braids are fully submerged in the water. Hold the braids in the water for about 10-15 seconds.
Step 4: Remove Braids from Hot Water
After holding the braids in the hot water for a few seconds, remove them from the water. Gently squeeze the excess water out of your braids using a towel. Be careful not to squeeze the braids too hard, as this could cause them to become frizzy.
Step 5: Wrap Your Braids Around the Rods
Once you’ve removed the excess water from your braids, it’s time to wrap your braids around the rods. Take the end of your braids and wrap it tightly around the rod. Make sure the braid is wrapped tightly around the rod, so it stays in place. Once the braid is wrapped around the rod, secure it with a bobby pin.
Step 6: Repeat the Process
Repeat the process of dipping your braids in hot water, squeezing out the excess water, and wrapping them around the rods until you’ve curled all of your braids. Make sure to wrap each braid tightly around the rod to ensure that it stays in place.
Step 7: Allow Your Braids to Dry
Once all of your braids are curled, allow them to dry completely. This is very important and will prevent your braids from itching. You can use a hair dryer to speed up the drying process, but make sure to use a low heat setting to avoid damaging your hair.
Step 8: Remove the Rods
After your braids have completely dried, it’s time to remove the rods. Gently unwind the braids from the rods, starting.
Other indirect heat methods include braid curling, string curling, hot rollers, flexi rods, and so on, all of which can be done in the comfort of your home:
- Braid Curling: This involves separating your braids into small sections. Take a section and braid it tightly following the three standard braid manners after which you’ll dip it in hot water for a couple of minutes, and then unravel it afterwards for a beautiful wavy look.
- String Curling: Take a string and wrap it around a section of braids till you get to the ends, and then you pull upwards and secure the ends with the string. Dip it into hot water for a couple of minutes, and take it out, after which you’ll unravel it.
- Hot rollers: The rollers follow the same technique as the others above, take a small section of braids, wrap the ends around the rollers, dip them into hot water, and let it sit for a couple of minutes, take it out and afterwards remove the roller.
It is important to note that the curl outcome is different for every technique used and can range from wavy, to curly. You should have a clear definition of your desired look before using any curling tools.
If you prefer to use heat, a curling wand is a great option for curling the ends of your box braids. Take a small section of your braids, wrap it around the curling wand, and hold it in place for a few seconds. Release the braid, and repeat until all of your braids are curled.
Hot Products


Why You Should Consider Curling Your Braids

There are several reasons why you might want to consider curling your box braids:
- Adds Volume and Bounce: Curling your braids can give your hair more volume and bounce, which can make your hairstyle look fuller and more lively.
- Switch up Your Look: If you’ve been wearing your box braids in the same style for a while, curling them can be a great way to switch up your look and add some variety to your hairstyle.
- Saves Time: If you’re someone who likes to change up your hairstyle often, curling your braids can save you time and money. Instead of taking your braids out and installing a new set of braids, you can simply curl your existing braids to create a new look.
- Low Maintenance: Once you’ve curled your braids, you don’t have to worry about styling your hair every day. Your curls will stay in place for several days to weeks which means you can enjoy your new hairstyle without having to spend a lot of time styling it.
