
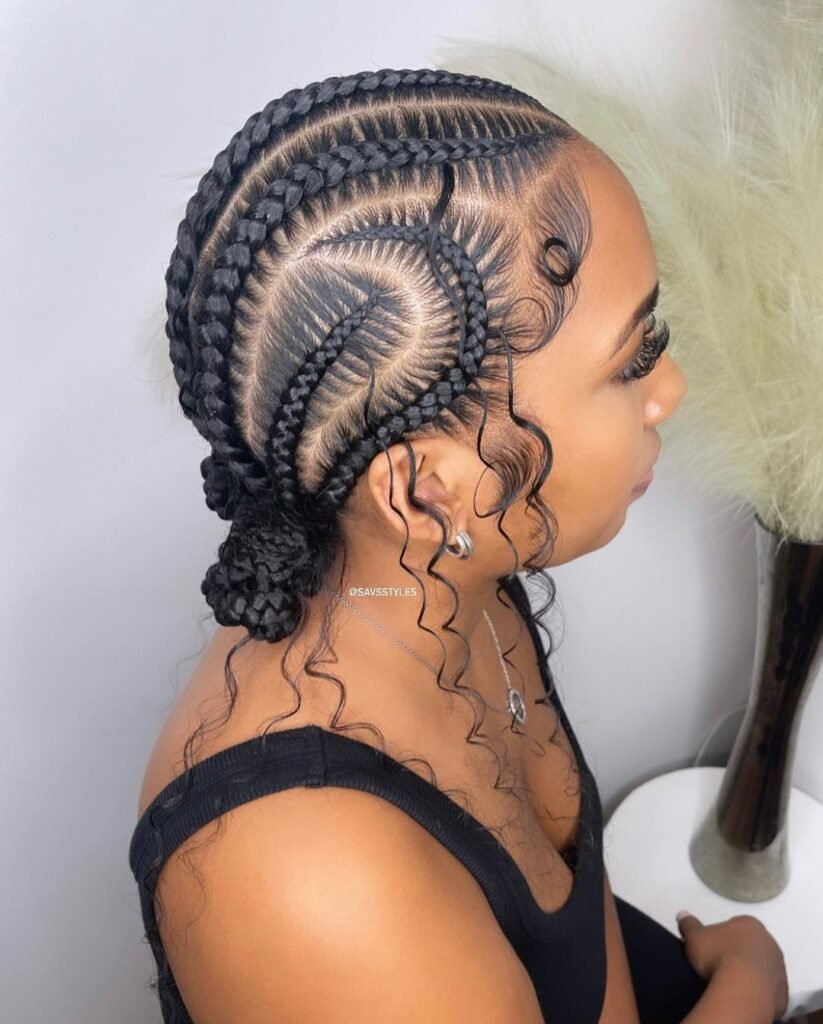
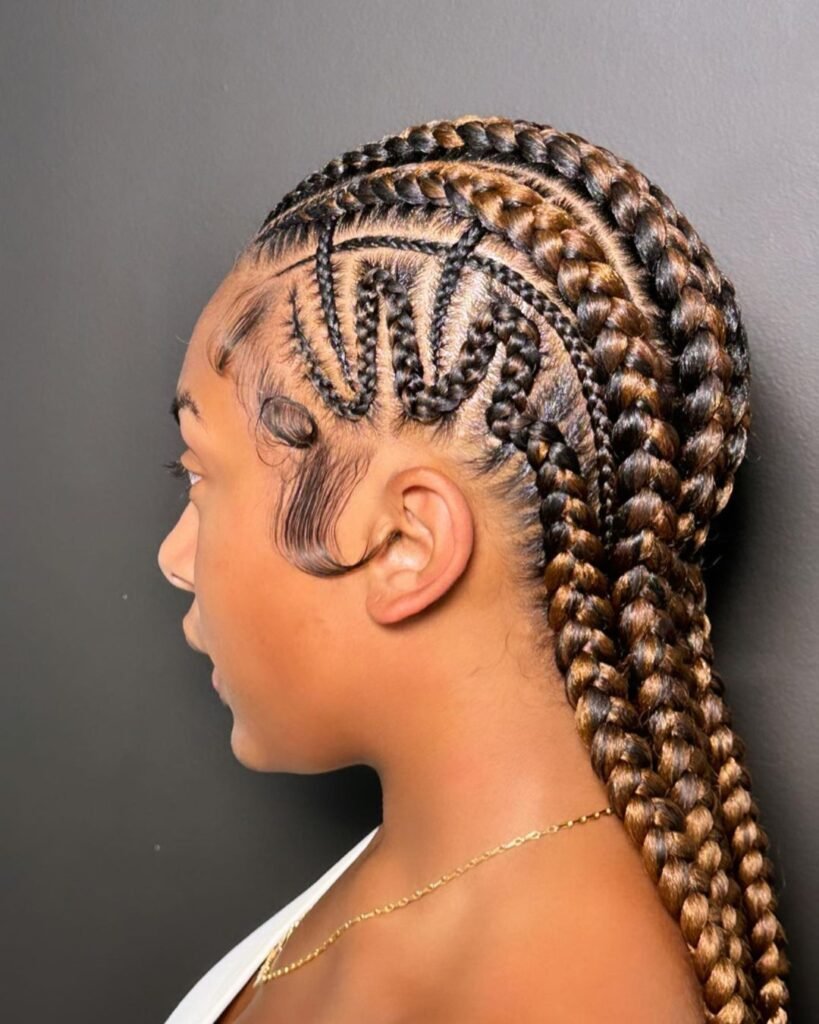
Braid Hairstyles
How to do Feed in Braids: Step-by-Step Tutorial

Oct
Feed in braids is a feeding technique that involves building up layers of hair extensions at the created cornrows. Continue reading for more details about the braiding process!
The feed-in-braids technique gives natural hair additional length and thickness while also enabling more styling options, including half-ponytails, buns, side-swept looks, half-up, half-down styles, and more.
Unlike box braids, which take a long time to install, feed-in braids are rapid protective styles that nonetheless accomplish the job. However, depending on the complexity of the style, length, and texture of the hair, they are not as long-lasting.
In contrast to rougher textures, finer hair does not give as much traction for this hairstyle, making it less likely to stay neat for extended periods. Depending on the aforementioned factors, feed-in braids can normally last two to four weeks.
Feed in Braids: Preparatory Process

Start the process on a readied hair bundle and natural hair. Start by washing, conditioning, and detangling your hair with the product that works best for your hair type and porosity. And, be sure to adequately detangle after which you follow up with moisturizing products– oil, cream, and leave-in conditioner in the LCO or LOC application method.
Blow-dry your hair completely or at least try to stretch it out before the process, if you would be applying heat, spritz on heat protectants to sections of your hair to ensure the individual strands are thoroughly coated.
Decide on your preferred hair extensions and ready them by stretching them out and giving them an acid vinegar rinse to get rid of an irritant that could cause the scalp to itch. There are also ready-made pre-stretched and pretreated bundles if that’s a worry.
The key to selecting a hair bundle is choosing one closest to your hair texture and preferred color. After which you split the hair extensions into smaller pieces, this would enable the feed-in process to go in faster and neater rather than having to make a stop to separate the extension before adding it in.
How to do Feed in Braids: Step by Step
Even while your hairdresser will know how to install the style properly, if your scalp is very sensitive, the process could be uncomfortable. You will suffer some tension to get the feed-in braids to look neat, so it’s essential to be aware of that. But it shouldn’t be uncomfortable and overly constrained.
Step 1
Start by dividing your hair into the desired number of rows. For hold and sleekness, use gel and smoothers. You can create as many rows or portions as you like by holding your rat tail comb in one hand and dragging it from the border of your hair towards the nape of your neck in a straight line. As you divide the hair, repeat this procedure for as many rows or sections as you choose. After that, you clip the remaining section away and use jam or gel to neaten up the parting.
Step 2
After dividing a little front portion near the hairline into three pieces, you can start braiding. It is easier to achieve a more natural look and put less stress on the edges and hairlines by starting with your natural hair. Take a small piece of hair extension and add it sporadically to the natural hair after braiding about two to three inches from the edges. The more extension you add, the thicker the cornrows become, and the more extension you’ll need to add for a coordinated and tidy appearance.
It’s pretty easy to add hair extensions; simply move the hair pieces into the left or right-hand sections, drape the extension over your hands, hold the hair pieces in place with your pinkie, and slide it into the middle piece. Then, braid, as usual, adding natural hair as you move down toward the nape of the neck.
Step 3
When you reach the nape of your neck, continue braiding a standard three-strand braid until the hair is worn out. If the length isn’t what you wanted, add more hair extensions to attain your desired length.
Step 4
After you’ve finished braiding, give the braids a trim and then soak the ends in hot water to secure the braids and keep them from coming undone. Use a hair spray to add shine, make it easier to blend in your natural hair, and prevent frizz! Dry your hair by squeezing it in a towel. To avoid scalding and unintentional skin contact, be careful when handling hot, boiling water.
How to Care for Feed-in Braids
If the natural hair that is supposed to be protected isn’t, as happens when the feed in braids isn’t taken care of, a protective hairstyle would lose its purpose. The following tips can help you take good care of your braids:
- The most crucial braid care tip is to clean your scalp since a clean, healthy scalp ensures healthy hair. You can lessen frizz by massaging your scalp with a cotton ball or a clean towel dipped in shampoo. You can also use old toothbrushes in the same manner as you would the others.
- Apply a conditioner as usual after giving your scalp a thorough washing with a cloth or cotton ball. Similarly, as you would a shampoo.
- Dry your hair fully before adding moisturizers, such as light oils, to your scalp and massage them in to encourage blood flow and hair growth. Your hair is kept hydrated all day long by a leave-in conditioner.
- Wear a silk scarf or satin bonnet to bed to prevent frizz because the silky texture of these items provides a smooth glide that enables the retention of nighttime care and treatments. This will also help to maintain the hairstyle. As opposed to cotton bedding, which absorbs moisture from the hair because of its rough texture, which grips and pulls on the hair strands, especially throughout the night when you toss and turn.
The feed-in braids must be washed as instructed to maintain the health of the hair. The aforementioned method would help minimize frizz, and a braid spray would add more gloss and durability. It is typically advised to wash braids after two weeks if you intend to wear them for more than four weeks.
Pros and Cons of Feed-in braids
If you are unsure whether using feed-in braids is the right choice. Here are a couple of reasons to either support or deter you!
Pros
- Installation happens quickly. Depending on the style, length, and texture of the hair, it usually takes one to three hours. Smaller and more complex styles would require much more time.
- It’s a fantastic protective styling option. Without it, the list wouldn’t be complete. If you’d want to spend less time styling your hair while still looking lovely and having it protected, feed-in braids are a great alternative!
- t doesn’t cost a lot. When it comes to pricing, feed-in braids are among the more affordable options. Depending on how complex you want the design of your style to be, they can cost anywhere from $80 and $100.
Cons
- The style won’t last very long. This might be a win to others and a fail to some. Either way, figure out what it is for you.
- If not properly done, they could be installed too tightly, which is courting edge thinning and traction alopecia, either way, screams damage.
